The importance of cleaning lash extensions

One of the most common issues as an eyelash technician, and also one of the most frustrating – dirty lashes. When a client arrives at their appointment with makeup residue, glue stuck in their lashes or oily lashes, its extremely time consuming to then spend extra time cleaning the eyelash extensions before you even begin your appointment. Ensuring your clients arrive at their appointments free from make up, oily buildup and mascara free makes our lives so much easier!

The more we educate our clients, then means clients can then take responsibility for their own lashes, and how to take care of them properly. Once your clients understand how to take care of their lashes and cleanse their lashes and lash extensions, life becomes so much easier for the both of you.

Aftercare products are becoming more important than ever, and the lash process should become part of our weekly routine – like washing our hair, we should be washing our lashes!! As lash artists it is our job to ensure our clients are educated the right way. 

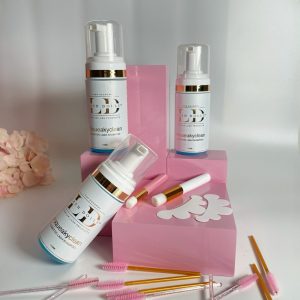
One of the best ways to help a client with frequently dirty lashes is to recommend a lash cleaner. Lash shampoos are little bottles of magic formulated to lift make up and any unwanted nasties off the lashes. Washing your lashes has the same theory behind it as washing our hair,  oils catch into the lashes just like they do on your head, they are just more difficult to see in a smaller area. Here at Lash Dolls U.K. we recommend our ‘Squeaky Clean’ lash shampoo to all of our clients and customers. This will keep their lashes clean, fresh and in the best condition. Our ‘squeaky clean’ lash shampoo is especially formulated for sensitive eyes, making it perfect for all clients. You can be sure it won’t irritate your clients eyes, but is strong enough to get rid of any make up residue, oils or skin debris. 

Helping to keep your lash extensions clean and therefore lasting longer is one of the most important parts of aftercare. Lash extensions do not stick to dirty lashes, so if you want your clients to receive the best retention possible then explaining the importance of cleansing their lashes is key! 

We understand that speaking to your clients about their dirty lashes can be an uncomfortable topic, we recommend asking if they use certain face washes or make up that are oily which could be affecting their lashes. If your client is naturally oily, or wears a lot of make up then we recommend them to be cleansing their lashes daily, other than that clients should be cleansing lashes every other day. You could then suggest an oil-free make up removers, face washes or moisturisers. Explain how oils are the number one enemy of lash glue and extensions in general and remember, the more we educate, the more your clients will understand the importance and logic behind what we are telling them. Which will, in turn, improve the retention of your clients lashes and also start giving you more time as you will not be spending time cleaning lashes at the beginning of appointments. 

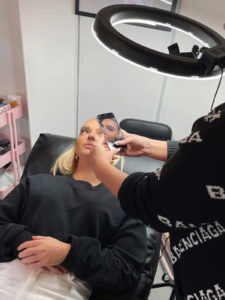
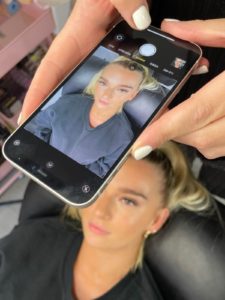
You could also take a photo of your clients lashes before cleansing, so they can have a visual of what their lashes look like. It is hard for clients to see the dirt in their lashes if they aren’t looking up-close, so by seeing what they look like under the bright LED lights of your lash studio could give them an instant shock! Many people just don’t think their lashes are as dirty as they are. Remember to do this respectfully and quietly as I’m sure they wouldn’t want the whole salon to know what condition their lashes are in. 

Click here to shop our ‘squeaky clean’ lash shampoo

Written by: Lucy Askham

How to take a good lash pic

As a lash artist, your photos are a key part within your business. If you have bad photos, it could mean to your lash work isn’t being showed off to its best potential! Social pages such as Instagram play a huge part in our lives, so by having amazing photos and content is key to growing your business. Good photos mean more likes, more saves, more engagement and all of this will lead to an increase in exposure! Exposure doesn’t always mean you have to have the most followers, but just that your work is getting noticed by the key audience around you. This could be potential clients in your local area, friends of friends sharing your work, and other local businesses seeing your work and waiting to work together. 

As a society we spend much more time on social media than ever before! It’s always there, from the moment we wake up, to the moment we fall asleep with our phone in our hand. The average user spends 2 hours and 24 minutes on social media per day in 2020, with Instagram as the second most popular social media channel, behind Facebook – with 112.5 million users in 2020,  this is a 5.4% increase from 2019. As a business so focused on producing good content, and perfect imagery to show off your work, Instagram is the most popular social page for lash artists to use. 

By following these simple steps will help you to produce better, more effective lash photos. 

Tip 1. 
A clear/clean camera lens.

You don’t need the most up to date camera phone or digital camera to produce the best images. Yes, this is helpful as the higher quality camera, the higher quality images. But in reality- this isn’t the case for everyone. As long as you have a clean camera lens that doesn’t have any marks, you’re good to go. A dirty lens could cause your photo to have marks on it, which isn’t ideal when you’re wanting your image to look as perfect as possible! 

Tip 2.
Good lighting.

A good light source will not only illuminate each carefully placed lash, it will improve your camera’s ability to focus and sharpen your images, which is ideal when you’re wanting to highlight something as delicate as lash extensions. Light brightens up tired skin, and creates a greater contrast between the skin and lashes so your sets pop! 

Natural light is a must! (if the weather is on side).The clarity you receive from natural light can be better than any artificial lighting you can buy, so by taking images by a window on a bright clear day can really take your images to the next level. If you have a salon or space that is light, with plenty of windows and natural light coming through, then your images will then be clear and bright. You can buy additional lighting for an extra wow! We recommend using ring lights or LED panel lights, you can purchase these on sites like eBay or amazon. On a day where its darker and natural light is lacking, or if you’re working in a space with few windows, then by adding artificial lighting provides better visual clarity, especially for detailed work such as lashing, and also helps reduce eyestrain.

We recommend having a space that has plenty of natural light and also investing in artificial lighting, as by having both will compliment each other. Daylight lighting will noticeably improve the look and feel of your lash studio, transforming dim and ugly yellowish light to a whiter and brighter shade – this helps with the addition of artificial lighting. By doing so makes the environment more appealing to your clients, as no one wants to get lashed in a dark and dingy room! 

Tip 3.
ANGLES, ANGLES, ANGLES!!!

Varying the types of photos you are posting will add a different element of artistry to your page. Posting 100s of the same image can get slightly repetitive, and showing off your work from different angles can give your grid a more interesting aesthetic. Finding what angles you prefer is down to a lot of practise and also personal preference. However, there are some key aspects that you should avoid. For example, having a good and clear background will ensure your image looks clean and tidy. Although your photo will be primarily be showing off the eyes – you don’t want a messy background, or any glue pots hanging round in the back. Ensure any mess you may have created from lashing is removed. Don’t be afraid to get up close and personal when taking your pictures! Holding your phone inches from your client’s face may feel slightly awkward at first – especially if its a new client. But the closer your camera gets to the eye, the sharper, and more defined image. Try not to zoom as this will cause your image to lose quality. Have a play around with what angels you like best, and do some research from other lash artists you like and see how they take their images. Practise, practise, practise is key!

Tip 4.
Tidy up.

After spending hours creating the perfect set for your client, clearing the background and finding the perfect lighting – before taking any images make sure the set is tidy! This means having no lashes hanging down, or that are out of place. The smallest details really matter here. And don’t forget your clients eyebrows, a quick brush and tidy up will go a long way. 

Tip 5.
Editing.

Editing is very personal, some people like it natural, others like a more airbrushed finish, do whatever suits you! This is your work after all. However over-editing can take away from the intricacy and detail of the lashes – which you want to be the main focus. Your clients skin should never look blurry, and over-editing can take away the clarity. Editing out blemishes, and evening out skin tones can work wonders to make your images look more ‘perfect’ but some clients may get slightly offended if you have completely changed their face. Tools like the ‘smooth tool’ should be used delicately and carefully, to enhance and image – not to change it. By working on your camera angles you are able to produce different images for each client, e.g. if your client has a lot of redness or a breakout, that they may not want the whole of Instagram to see, then take a close up eye picture instead – or if your client has the most amazing skin, then this can be more of a full face image. 

When editing your lash photos, play around with the brightness, the contrast and tones of the images and figure out how you like your images to look. You will not be able to edit each picture EXACTLY the same, as you may never get the same lighting, but having similar tones will create a more cohesive feed. Also downloading an instagram feed planner such as Later, can really help as you are able to see what your photos will look like next to each other, before uploading. 

We hope these 5 tips have helped you understand how best to take a lash photo, by following these simple steps and getting in some practise, you’ll be a pro in no time!

Find our full range of Lash Dolls U.K. lashes here, and get practising!


Written by: Lucy Askham
Join Waitlist We will inform you when the product arrives in stock. Please leave your valid email address below.